
Latest Posts by emrysslowlylosestheirshit - Page 2


I’ve seen lavender syrup and lilac sugar trend so here’s a recipe using one of my favorite flowers/weeds, the dandelion. They grow easily, remind me of childhood innocence and hope, greens can be used in salad, and can even flavor honey with them. Recipe for vegan “dandelion honey” aka dandelion syrup. Tastes great in teas.
Dandelion Syrup
Ingredients:
Dandelion flowers (about 60)
1-1/2 cup water
1 cup sugar
1/4 cup brown sugar (or 1/4 cup honey)
1/2 lemon, juice and zest
Instructions:
Harvest dandelions! Note: You can harvest in advance of making this syrup. Put blooms in an air-tight freezer bag in the freezer until you’re ready to get started.
Snip off blossoms from the green base into a container. Then rinse the flowers and pat dry. (You can skip this step to retain more of the pollen which is good for the immune system. If you are concerned about bugs though, inspect closely or they will also be strained out later.)
Add flower heads and water to a pot. Bring to a boil, and let it boil for 30 seconds to a minute.
Then remove the pan from the heat and steep over night (or at least 8 hours).
The next morning, strain the liquid into another pot or bowl. You can strain over a cheesecloth or a fine mesh strainer, squeezing out as much water as you can.
Return the strained liquid to the pot and discard the flowers. Add the sugar, lemon zest, and juice to the pot and simmer for one hour.
Let the syrup cool. Note: The syrup won’t thicken until it has cooled. Once it has cooled, taste it with a spoon. Adjust to taste with sugar and lemon juice.
That’s it!
Transfer to a sterile class jar or container and leave to cool completely. It can keep in the fridge for up to a month.
Recipe from farmer’s almanac


ko_lo_man
“Sharlotka” is a classic Russian apple cake. In some parts of the world, it’s known as the French Apple cake and it is best described as an apple sponge cake. This cake is packed with apples😍 Unlike traditional apple pie, which is heavy on the crust, this cake makes apples the star of the show. This results in a cake that is airy, soft and beautifully simple. Feel free to use any apple in this cake.
Soooo, you need:
4 eggs
1 cup sugar
1 cup all-purpose flour
1 tsp baking powder
1 tbsp cornstarch
4 large apples
powdered sugar for dusting
Wash, peal and dice apples into one inch pieces. Using a mixer, beat eggs with sugar, until it’s three times in volume. Using a spatula, fold in flour by thirds, add 1 tsp of baking powder and 1 tbsp of cornstarch. Line a baking pan with parchment paper. Cover bottom of the pan (I use 8 inches pan/20cm) with some cake batter, lay out the diced apples, cover apples with cake batter, shake the pan a bit, to spread batter between each apple piece. You have to do two layers of apples and cover the top of your cake with cake batter. The main thing is that the cake batter has to be not too thick and not too liquid.
Bake it at 350F/180C for 40 minutes, check using a wooden toothpick. If the cake is ready, the dough should not stick to the toothpick. It may take a bit more than 40 mins.


Millionaire shortbread recipe 😋
Cr. Instagram


✨🌱Lilac syrup 🌱✨
I finally got around to making use of the beautiful lilac bush in my backyard, so here’s the recipe I came up with to make her!
Ingredients needed:
Four cups of lilac petals
Two cups water
Two cups sugar
Teaspoon of vanilla
Combine sugar, vanilla, and water in a pan on high, stir until dissolved.
Once dissolved, add in your lilac petals (make sure they’re separated from the stems!!!! It’ll get bitter if not). Bring to a boil and then let simmer on low for five minutes.
Then, combine in a jar and store for three hours - the taste should be floral and heavy.
Use in tea, lemonade, or whatever else you’d like to try it in!
Blessings to you all. 🌸✨🌱💫🧚🏻


Made lavender vanilla bean scones 🥺☁️ Ik it isnt so studyblr related but I’m very proud of them

Strawberry Mint Lemonade
½ C. Granulated White Sugar
½ C. Water
4 Lemons, Juiced (about ½-¾ C.)
½ C. Sliced Strawberries
1 Tbsp. Granulated Sugar
¼ C. Fresh Mint Leaves
2 C. Water
(I know the way I wrote out the measurements is funky, but it is divided for how it needs to be used.)
Begin by slicing your strawberries and put them in a small bowl. Toss with 1 Tbsp. granulated sugar and set aside.
In a small pot, stir together ½ cup granulated white sugar with ½ cup water. Turn the burner on low and heat until the sugar is completely dissolved, creating a simple syrup. Remove from heat.
Either chop up your mint leaves or grind them in a mortar and pestle to release the oils. Mix it in with your strawberries. After about 10 minutes, mash up your strawberries with a fork or potato masher to help release the juices.
Add your strawberry-mint mixture to a small container (I used a jar, but you can use a small pitcher or whatever you have on hand). Pour warm simple syrup over the fruit and let stand for a few minutes. Mix aggressively, or shake if you are using a jar. Add the lemon juice and 2 cups of cold water. Stir well. Let stand in the fridge for several hours, or overnight.
If you are like me and hate pulp in your drinks: let the mixture stand overnight and strain into another container to get rid of the floaty bits.
Note: I like pretty sour lemonade, so if you don’t love sour things either use less lemon juice or increase the amount of simple syrup.
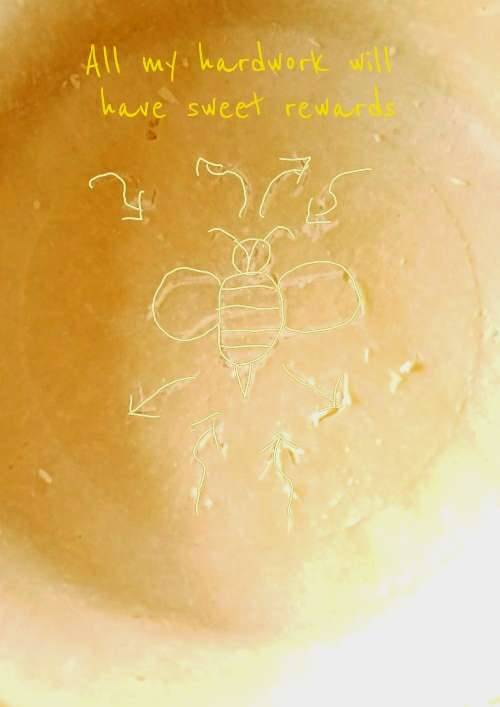
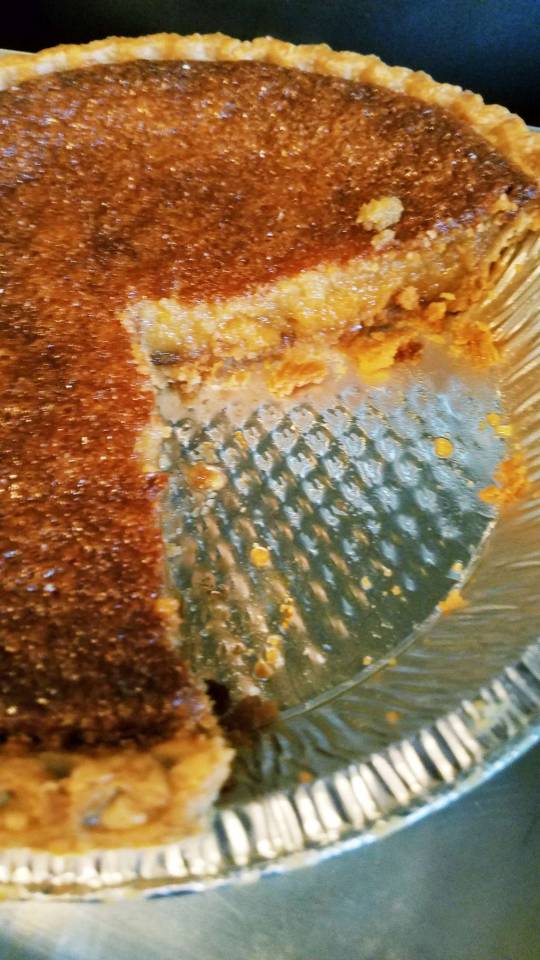
Salted Honey Pie 🍯

An old fashion pie recipe that’s super simple to make and a great Ostara/Spring Dessert! I’m making one for this Easter with my family.
Honey, Eggs, Cream are all Spring Foods. Honey symbolizes sweetness and the rewards of hardwork just like the little bees that work so hard to make it! 🐝
And Salt banishes negativity and is purifying!
This dessert is perfect for getting rid of the stress or worry of Winter and welcoming any sweet rewards from your hardwork in the future this Spring!
Ingredients:
One 9 inch Pie Crust (Store bought or one of your favorite crust recipes)
½ Cup of Melted Butter
¾ Cup of White Sugar
2 Tbs of Cornmeal
¼ tsp of Salt
¾ Cup of Honey
2 Eggs + 1 Egg Yolk
½ Cup of Cream
2 tsp White Vinegar
1 tsp of Vanilla Extract
Salt Flakes for Garnish
Preheat your oven to 350. In a large bowl, mix together your dry ingredients before slowly mixing in your wet ingredients one at a time…. (I never do this and just mix it all together randomly as I go, but it’s up to you.)
Feel free to add a sigil to the base of the pie crust. This is mine -
Pour mixture into your pie crust, it will be liquid and thin; that’s okay!

Cook for 45 to 60 minutes or until the top is golden brown and it starts to bubble.(I recommend 60 minutes on the middle rack. Mine didn’t burn at all!)

Take it out of the oven and let it cool for One hour or more to let it solidify. This step is very important to make sure it isn’t too liquidy. The consitancy should be like Pecan Pie Filling.
Garnish with Sea Salt or Himalayan Salt; any big salt flakes. But regular table salt will do just fine if the others aren’t available.
Done! 🍯🐝🍽😋
This can be used for Litha too!
Strawberry Trifle

Ingredients:
Vanilla Pudding (store bought or homemade, recipe below)
Castella Cake (homemade or store bought, recipe below)
Strawberries
Whipped Cream (300 ml heavy cream, 40 g white granulated sugar)
Instructions
1. Create a layer of castella, then fill the sides with half cut strawberries. Then dice some strawberries, enough to create a whole new layer.
2. Top with the pudding, then add another layer of castella. You can add strawberries again but I didn’t.
3. Add your whipped cream and top with whole strawberries. Serve and enjoy!
Homemade Vanilla Pudding
2 ½ cups half and half
½ cup granulated sugar
¼ cup lightly packed light brown sugar
3 tablespoons unsalted butter
1 teaspoon vanilla bean paste or pure vanilla extract
2 ½ tablespoons corn starch (I used 7 tsp of arrowroot flour)
Instructions
In a medium saucepan, bring 2 cups of half and half to a simmer (do not boil). Add both sugars and vanilla. Cook until the sugar is completely dissolved, stirring constantly to prevent scalding. Stir in the butter until melted. In a small bowl, whisk together the remaining half and half with the cornstarch. Slowly add the cornstarch mixture to the half and half whisking constantly. Continue cooking until the mixture has thickened and coats the back of a spoon. Transfer the mixture to a bowl and cover with plastic wrap being sure the plastic wrap is touching the top of the pudding. (This will prevent a skin from forming.) Refrigerate for 2 hours or up to 24 hours.
Homemade Castella
6 large eggs (50 g each w/o shell) (at room temperature - very important!)
200 g sugar (1 cup)
200 g bread flour (1 ½ cup + 2 ½ Tbsp) (See Notes)
80 ml honey (⅓ cup; 5 Tbsp)
2 ½ Tbsp water (warm)
Honey Mixture for Brushing Castella
1 Tbsp honey
½ Tbsp water (warm)
INSTRUCTIONS
Gather all the ingredients.
Cut parchment paper to fit the baking pans (See the video for this process). https://youtu.be/a2vaM_aRHv4
Preheat oven to 320 ºF (160 ºC). (I always do this before I bake the dessert)
Sift the bread flour with the sifter or a fine-meshed strainer twice. Holding the handle with one hand and tapping the strainer gently with the other, the flour will gradually sift through the strainer.
Add 2 ½ Tbsp warm water to honey and whisk well.
Fit the mixer with the whisk attachment. Crack eggs into the bowl and vigorously whisk until combined.
Add the sugar
Beat the eggs and sugar on high speed (Speed 10) for 5 minutes. The volume of the beaten eggs will increase about 4 times. The texture will be thick and the color will be pale yellow. When you stop the mixer and lift the whisk attachment, the mixture should fall in ribbons.
Add the honey mixture into the egg mixture and whisk on low speed (Speed 2) until combined, about 30 seconds.
Add the bread flour at three separate times: add 1/3 of the bread flour and whisk on low speed (Speed 2) for 15 seconds, then add more flour and whisk for 15 seconds. Add the last remaining portion and whisk until just combined for about 1 minute. Do not overmix.
Spray the loaf pans with oil and spread out evenly with pastry brush.
Put the parchment paper in the pans and make sure the paper sticks to the pans. If not, add oil and spread out evenly with a brush.
Pour the batter into the pans (about 80% full).
Using a skewer, draw a zigzag line to remove the air bubbles in the batter.
Level batter in each pan by holding pan 2-inches above counter dropping it flat onto counter. Do this several times to release air bubbles.
Bake at 320 ºF (160 ºC) in the middle rack of the oven for 35 to 40 minutes, or until golden brown and a skewer inserted in the center comes out clean.
Mix 1 Tbsp honey and ½ Tbsp warm water in a bowl and apply the honey mixture on top of the cake with a pastry brush.
Place a sheet of plastic wrap on the counter top. Take out the cake from the pan to the plastic wrap, top facing down. Gently peel off parchment paper.
Immediately wrap the cake with plastic wrap to keep the moisture and while it’s hot store in the refrigerator overnight (at least 12 hours), keeping the top side facing down. This will help the cake have more fine and moist texture.
To serve, slice off the sides of the cake with a sharp bread knife and cut into ¾ to 1 inch thick slices (you get 7-8 slices total). It’s better if you bring the cake to room temperature before serving.
Iced Lavender Milk Tea🥛
hello! it’s rather warm where i am right now but i really love tea and milk teas, so i made this up last night!
lavender syrup
1 cup of water
2 cups of sugar
2 tablespoons of lavender (maybe try other flowers!)
put the lavender buds and water into a small saucepan and have it reach a boil! once it does, add the sugar and reduce heat so that it simmers (probably medium low). have it simmer for about fifteen minutes. once that time has past set it aside to cool!
tea!
brew a tea you prefer! i did earl grey, but chamomile would work too!! i’d do two tea bags since you’ll be adding ice and milk. once it is at a strength you find appropriate take out the bags and let it cool!
fill glass about a third full of ice, then add tea, maybe three spoonfuls of the syrup, and milk!
add a little vanilla extract if you have it!
for all you witchy folks too, lavender is known for symbolizing love, so share it with someone you love to welcome in the warm weather!! also feel free to add the extra lavender syrup to other drinks too, it’s very tasty!
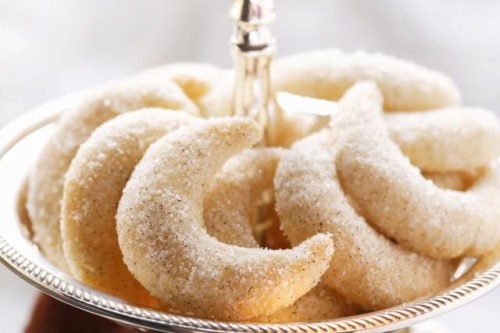
Moon Spell Cookies Ingredients: • 1 cup of finely grated almonds (optional) • 1 ¼ cups of flour • ¼ cup of confectioner’s sugar • ¼ cup of butter • 1 egg yolk Directions: 1. Combine almonds, flour, and sugar. 2. Work in butter and egg yolk until well blended. 3. Set it in the fridge until chilled. 4. Roll into crescent moon shapes or use a cookie cutter. 5. Place on greased cookie sheet and bake at 320 degrees Fahrenheit (160 degrees Celsius) for 20 minutes. Spells for: Love - Add a few pinches of rosemary, sweet basil, cinnamon, and honey. Prosperity - Add cinnamon, nutmeg, basil, and grated lemon peel. Protection - Add cloves, rosemary, anise, and cinnamon. Psychic Ability - Add star anise, nutmeg, orange, and thyme.

MAGICK CHOCOLATE CHIP COOKIES
Ever wonder why your mom’s chocolate chip cookies tasted so good? I always did that’s for sure.
My grubby toddler hands would snatch one from the kitchen and cram it into my mouth, melted chocolate dripping from my chin. Turns out Magick can explain it.
Ingredients + Magick correspondences
Witchy Tip: Place a piece of rose quartz charged with positive energy near the food to make the food taste better
¾ cup Crisco Butter flavored shortening
Stick with me here, Crisco makes your cookie more airy and soft.
1 cup dark brown sugar
Sweetness, Comfort, Love
¼ cup white sugar
For romance and love
2 cups All-Purpose Flour
For Consistency
2 tablespoons milk (any milk will do)
For love and nurturing
¾ teaspoon baking soda
To banish negative energy
1 tablespoon vanilla extract
For love, lust and luck
1 egg
For finding true love
1 teaspoon of sea salt
To Banish Negative energy
½ cup chopped pecans
Wealth, Prosperity
Chocolate Chips and Chopped Chocolate bar (I use Hershey) No measurement, because you measure that shit with your heart.
For comfort
Directions
Start by heating your oven to 375ºF.
Now in a kitchen aid on medium speed, beat your shortening, sugar, milk, and vanilla until very light and airy. About the duration of 2 plays of the song Put Your Head On My Shoulder by Paul Anka
Beat in egg. Now in a separate bowl combine flour, salt, and baking soda. Mix into shortening mixture until just blended.
Now with your chocolate chips pour in until your heat says stop. If you wanna add the whole bag then you add the whole damn bag.
With a cookie scoop, scoop them onto a baking sheet lined with parchment paper.
Bake 8 to 10 minutes.
Now I know there is no such thing as a perfect chocolate chip cookie, but these cookies are definitely hella addictive. In fact, is that your third cookie?
I love you all! My DMs, mail, and comments are always open!
xoxo, Angel.
𝕎𝕚𝕥𝕔𝕙𝕪 𝕋𝕙𝕦𝕞𝕓𝕡𝕣𝕚𝕟𝕥 𝕔𝕠𝕠𝕜𝕚𝕖𝕤
Hey guys! I have you a thumbprint cookie recipe to try out! They are super delicious and as you can see from the picture above, I managed to whip up this batch this afternoon.
The cookie itself crumbles and melts in your mouth, and is extremely quick and easy to make. Not to mention they look amazing!

Ingredients
For the dough:
1 cup butter
¾ cup powdered sugar
2 egg yolks
2 tsp vanilla extract
2 cups and 2 tbsp all-purpose flour
Pinch of salt
Now for the fun part…the jam filling!
This is where you can get very creative so hear me out.
Aphrodite’s Love Jam
With this recipe, you can give to a loved one or a crush ;) or to a friend to strengthen a bond. This combo tastes and looks lovely and will sure to impress the recipient.
½ cup Smuckers raspberry jam (Love, Fertility, and courage)
2 tbsp strawberry juice (Love, luck, and admiration)
1 squirt of lemon (Love, purification, beauty)
Combine all the ingredients on low heat until all together. Let cool and spoon into a piping bag or a bowl if you want to spoon the jam into the cookie.
Thumbprint Friendship Jam
Make these cookies for your friends or coven and they will be sure to love you for it! Strengthen any bond with these delicious cookies!
¼ cup orange marmalade
¼ cup apricot jam
2 tbsp cherry juice
Combine all the ingredients on low heat until all together. Let cool and spoon into a piping bag or a bowl if you want to spoon the jam into the cookie.
Good Vibes Thumbprint Jam
These cookies are not only yummy but will give you good vibes!
¼ cup Smuckers grapefruit jam (Anti negative energy, happiness, gentleness, confidence, protection)
¼ cup orange marmalade (Prosperity, divination, creativity, inspiration)
1 tbsp pineapple juice (Stress relief, luck, prosperity, happiness)
Combine all the ingredients on low heat until all together. Let cool and spoon into a piping bag or a bowl if you want to spoon the jam into the cookie.
Directions
First, preheat your oven to 320 F.
In a medium-size bowl combine softened butter and powdered sugar until fully combined with a spatula. You can now add your egg yolk, vanilla, and salt. Mix until very smooth.
Add in sieved flour and stir. Now work with your hands until you form a nice smooth ball. The dough with start off crumbly, but as you work it, it will become smooth.
Line your baking sheet with parchment paper and make small, equal-sized balls and place them on the sheet. Now with a ¼ tsp or your thumb, make indents in the dough. Make sure to oil your tsp to make sure it doesn’t stick to the dough. Add in your jam mixture with a spoon or a piping bag.
Bake the cookies for 16 minutes or until done.

I enjoy your criticism, likes, and reblogs! It lets me know that I’m doing a good job :)
I love you all! My DMs, mail, and comments are always open!
xoxo, Angel.
Traditional Irish Soda Bread for Lughnasadh 🌻🍂🌞🌿

This bread is extremely easy to make, quick, and simple but delicious! Being a traditional and antiquated Irish recipe, it’s a wonderful choice of bread to make for Lughnasdah. Irish Soda Bread is also a bread that doesn’t keep for more than a few days, so it’s best for sharing with friends and family during a meal or celebration to ensure it’s all eaten quickly!
You Will Need:
3 cups of white all-purpose flour
1 1/2 tsps of baking soda
1 1/2 cups of buttermilk (you can substitute regular milk by adding 1 tablespoon of white vinegar)
Instructions:
Mix the flour and baking soda in a bowl, and then stir in the milk slowly, incorporating the milk in small increments. I used a wooden spoon to do this until the dough started to form, and then I switched and used my hands. Be careful not to over-stir or over-knead the bread.
Once the dough starts to form, place it on a lightly floured baking sheet and carefully shape it into a rounded disc, approximately 6” - 7” in diameter, and 2” thick.
Brush on melted butter over the top of the bread dough you have shaped, and sprinkle desired herbs on top. (I used rosemary and thyme) Then, cut an X into the top, or you could use any other desired symbol!
Bake at 400 F for 20 - 30 minutes, mine took about 26 minutes! Remove from stove and allow it to set on the baking sheet for 10 minutes before moving to a cooling rack. After an hour, the bread should be set and good to slice and share! I placed mine in a basket wrapped in a towel.
Lammas Breaking Bread Abundance Spell
“Abundance for you, Abundance for me. Abundance times two, Abundance times three. Slice it up, pass it around. Blessings for everyone shall be found.”
“And so mote it be.” 🍞🌿🌻🌽🍂


Blueberry picking
Hello! I hope you are enjoying your summer. Lughnasadh is upon us, the first of the 3 harvest holidays. I usually spend this day on the countryside, hiking and enjoying the sun, but this year it is a bit different for obvious reasons!
I know that usually it is custom to bake some bread for Lughnasadh I am a bit of a rebel so today I am offering you a really great recipe if you plan to do a picnic of a feast to celebrate this special day! I have cooked these tarts more than 3 times already and it is always a success! The recipe is a bit long, and I tried to make it as clear as possible!

Strawberry and Wine tarts
The perfect dessert for Lughnasadh
Prep time: 1 hour
Rest time: 1 hour
Cook time: 30 minutes
Yields: 6 to 8 small tarts or 1 big tart


Ingredients
- Dough
120g (1cup) plain flour
60g (1/2cup) whole meal flour
2 tbsp brown sugar
1/4 tsp salt
100g butter
- Mascarpone Cream
250g (1 pack) mascarpone
35g (1/4 cup) powder sugar
60g (2 tbsp) heavy cream
- Strawberry and Wine syrup
500g strawberries (more or less, it’s not really precise)
55g (1/4 cup) sugar
juice of 1 lemon
A few fresh Thyme sprigs
60g (1/4 cup) port wine
Preparation
//Dough
In a bowl, mix everything until you have crumbs
Add a bit of water for the dough to keep together
Make a flat ball, wrap it and let it rest in the fridge until needed (at least an hour)
//Strawberries
Rinse and cut the strawberries in slices and put then in a bowl
Add the lemon juice, a few fresh Thyme sprigs and sugar
Let it rest in the fridge for until needed (at least 30 minutes)
//Pie crusts
Pre-heat your oven 180°/375°F
Roll out a portion of the dough about 5mm thick
Drape over a small tart tin with it and trim the excess
Put back the trim with the rest of the dough
Repeat until you don’t have any dough left
Pick the crust with a fork to keep the crust flat when baking
Bake in a hot oven for 15/20 minutes. The crust has to be light golden.
Let it cool on a tray
//Mascarpone cream
In a bowl, mix all the ingredients with a whisk or electric whisk until you have a creamy texture
Let it rest in the fridge until needed
//Wine Syrup
Stain the Strawberry juice and the Thyme in small sauce pan
Put the strawberries back in the fridge
Add the port wine in the pan, you can add more Thyme sprigs if you want a stronger flavour
Put the syrup to a boil then on medium heat until the liquid has diminished by half, or until syrupy
Remove the Thyme springs and set aside the wine syrup to cool
//Making the tart
Spread the cream
Layer with strawberry slices
Drizzle with a bit of syrup
Garnish with a few Thyme leaves

Tips
* These tarts have to be eaten the same day. I understand that the process is a bit long so you can cook the crust and whip the mascarpone the day before so you’d just have to do the strawberries, the syrup and the tarts the day where you plan to eat them
* Port substitution: You can use marsala as well, or nothing and just reduce the strawberry juice to make it a syrup
* If you choose to do a big tart, use weights when you bake the crust to keep it flat


The types of teas and their general benefits they offer to our bodies!
I prefer herbal teas and green/white teas. Growing up as a child, I was always exposed to black tea with milk. It was my favorite, and was soothing. Even though caffeinated, I never felt it and I'd drop asleep with the milk and honey mixed in.
Green Tea Cookie Choux
Ingredients:
Green Tea Craquelin
80g unsalted butter
100g sugar
90g flour(all purpose flour or cake flour)
7g(3tsp) green tea powder
Choux pastry
2 eggs
120ml water
50g unsalted butter
2g salt
75g flour(all purpose flour or cake flour)
Green tea pastry cream
6 egg yolks
100g sugar
500ml milk
45g flour(all purpose flour or cake flour)
5g green tea powder
1tsp vanilla extract
200ml heavy cream
20g sugar
Directions:
Green tea pastry cream
1. In a mixing bowl, add and mix egg yolks, sugar and vanilla extract until pale yellow. And then, add green tea powder, flour and mix well.
2. In a milk pot, add and simmer milk. You can add vanilla bean now instead of adding the extract in step (1).
3. Slowly add warmed milk to (1)egg yolk mixture and mix well.
4. In a pot, pour the (3) mixture and constantly stir until creamy on medium heat.
5. Transfer to bowl, cover with wrap and let completely cool.
Green tea Craquelin
1. In a mixing bowl, soften the butter kept at room temperature, add and mix the sugar, green tea powder and flour.
2. Make the dough into a ball, cover the top and bottom with plastic wrap or put in a bag and roll it to 2~3mm thickness.
3. Freeze before use.
Choux pastry
1. In a pot, boil water, cubed butter and salt. Turn off the heat when butter is melted. And then, add flour and mix with a spatula.
2. When flour is completely incorporated, turn on the heat again until a thin coat forms on the bottom of the pot.
3. Transfer the batter in a mixing bowl and cool it until lukewarm.
4. Beat the egg in another mixing bowl, slowly add the beaten egg into the batter and mix well using spatula.
5. Transfer the pastry batter into a piping bag and pipe into 3~3.5cm sized balls.
6. Cut the craquelin using a circle cookie cutter and place on the pastry batter. (I used cookie cutter at 3cm diameter.)
7. Bake into preheated oven at 180℃ for 20~25min. Temperature and baking time may vary due to type of the oven. Be careful not to open the oven in the middle, or the choux will sink.
Assembly
1. Gently fold cooled green tea custard cream using spatula.
2. In a mixing bowl, add and whip heavy cream and sugar until soft (about 60% whipped). If you want the cream thicker, whip the heavy cream more before mixing in the cream.
2. Stuff the green tea cream into cooled choux and enjoy
🌾🌻It’s Lammas! The first harvest! 🌻🌾

One of the nice things you can do to celebrate, is to bake bread or buns~! Since I’m going to grill with my friends today, i thought i’d make buns, because i’m going to be preparing burgers.
You will need:
for the dough:
320 g of wheat flour
120 ml of hot milk
one big egg
40 g of softened or melted butter
15 g of fresh yeast or 5 g of dry yeast
a teaspoon of sugar
a big pinch of salt
to lightly brush them before baking:
egg mixed with milk
Steps:
First of all get a big bowl and put all your dry stuff in it. (Except yeast if you’re using dry one)
add an egg and butter
while you’re mixing it, put the milk in the microwave and measure out the yeast you need.
when the milk is still hot but not too hot (be careful, you can kill the yeast with too warm milk) mix it with yeast.
When milk and yeast becomes smooth liquid, add it to the dough
And now you can use a mixer to knead the dough or just your hands.
When you have finished dough, cover it with something and leave to rise for 60 minutes.
After the 60 minutes, weigh the dough and make how many buns you’d like, put them on the baking sheet, and again
Leave them to rise for 30 to 40 minutes, they need to be covered!
Brush them lightly with the milk and egg mixture
Bake them! Heat your oven to 350F or 180C and bake them until they’re golden.
You can get creative with the toppings, you can make some more dough and make sun or flowers on top of them, to represent the harvest and the time of the year or as to represent a deity, you can add herbs of your choice on top, for example dried rosemary to bring happiness and protection, basil for confidence etc.
But most importantly, Have fun and enjoy the sabbath! 💞
Raspberry Cheese Babka Swirl
Ingredients:
Note- this recipe makes 2 loaves!
For the dough:
8 oz warm milk not boiling
2 packets of Active Dry Yeast ¼ oz each or 4 ½ teaspoons instant yeast
½ cup granulated sugar
3 large eggs
2 tablespoons vanilla extract
5-5 ½ cups flour plus more for dusting
½ teaspoon kosher salt
½ cup butter at room temperature
vegetable oil for dough
For the filling:
2 8 oz bar regular cream cheese softened
2 large egg yolk
3 tablespoons granulated sugar
2 teaspoons vanilla extract
½ cup raspberry jam or any other jam (recipe for it)
Directions:
In a large microwaveable bowl, heat the milk for 1 minute, 30 seconds at a time. If you are using a mixer, heat the milk in a measuring cup and transfer it to the mixing bowl. Add in the yeast and let it sit for 10 minutes until frothy.
Add in the sugar, eggs, and vanilla extract, and gently whisk to combine. Using the dough hook attachment, start adding in the flour one cup at a time mixing as you go. If you find the dough is coming together nicely after the 5th cup, then you can stop there. If it is still a little sticky, add the extra half cup of flour.
Add the salt into the last cup of flour and mix or knead until incorporated. Add in the softened butter and mix again until incorporated evenly. Continue mixing or kneading for 5-6 minutes, you may have to sprinkle some flour on your work surface so that the dough doesn’t stick. The dough is ready when it is no longer sticking to the surface and it is smooth and uniform throughout.
Place the dough back in the bowl used for mixing if you were kneading by hand. Pour 1 teaspoon oil around the dough and cover the bowl with a fresh tea towel. Leave it to rise to double it’s size for at least 1 hour or place in the fridge overnight.
Prepare the filling- in a small bowl combine the cream cheese, yolk, sugar, and vanilla and mix until combined evenly. Set aside and grab the jam.
Allow the dough to come to room temperature if it was stored in the fridge. On a lightly floured surface, cut the dough evenly in half and roll one portion out into a rectangle about 12” x 16” It can be smaller than that, you just want to make sure you have a rectangle shape.
Spread half the raspberry jam over the dough leaving a 1” border around the sides. Next spread half the cheese filling on top of that. Try not to mix the two if you really want to get the pink color, but it’s ok if you do a little bit!
Now starting from the long side, the side closest to you, start rolling the dough all the way up to the top border. It should now look like a log, like when you are making cinnamon buns, right before you cut them. Pinch the two ends of the log together and then with one hand on each end, twist the log as much as you can. Then fold it over so the ends touch, (like an upside down U) and do the same thing, twisting the ends in opposite directions. Kinda like a braid but with only 2 strands.
Spray a loaf pan with non stick spray and place the babka inside. Repeat the above steps with the other half of babka dough. Let the babkas rise for another half hour on your counter. Preheat your oven to 350° F and bake for 25- 30 minutes until golden brown.
Homemade Raspberry Jam
Ingredients:
2 ½ cups fresh raspberry
1 ¼ cups sugar
1 lemon, juiced
Directions:
In a medium saucepan add all your ingredients and over medium heat bring the fruit to a boil.
Stirring frequently, allow the fruit to boil for 20 minutes until the fruit starts to thicken. Remove from the heat and place a small dollop on a cold saucer. Push your finger through the dollop and if it feels gel-like and wrinkles then the jam has reached setting point. If it isn’t ready then return the pan to the heat and boil for another five minutes before testing again.
Ladle immediately into sterilised jars leaving 2 cm from the top and seal immediately with a screw top lid (lasts 3 months in the freezers, a few months in the cupboard)
Baked Cheesecake Donuts
For the doughnuts:
½ cup warm water
1 teaspoon finely grated lemon zest
½ teaspoon vanilla extract
2 ¼ teaspoons (1 packet) instant yeast
4 large egg yolks
1/3 cup (65 grams) granulated sugar
2 ½ (319 grams) cups all-purpose flour
¼ teaspoon fine salt
4 tablespoons (57 grams) unsalted butter, at room temperature
¼ cup heavy cream
For the filling:
8 ounces cream cheese, at room temperature
¼ cup heavy cream
¼ cup powdered sugar
1 teaspoon vanilla extract
For the topping:
¾ cup (150 grams) granulated sugar
2 teaspoons ground cinnamon
2 tablespoons (28 grams) unsalted butter, melted
Preparations:
Make the doughnut dough:
In the bowl of a stand mixer fitted with the dough hook, combine the water, zest, vanilla, yeast, eggs, and sugar. Gradually add in the flour then salt, mixing until absorbed. Add the butter and cream and beat on medium speed for 6 to 8 minutes, or until a smooth sticky dough forms. Remove the dough to a lightly greased bowl, cover, and let rise until doubled in size, about 1 to 1 ½ hours.
For the cheesecake filling:
Meanwhile, make the filling.
In a medium bowl using an electric mixer, beat the cream cheese, cream, sugar, and vanilla until light and fluffy.
Finish the doughnuts:
On a lightly floured work surface, roll the dough out to about ½-inch thickness. Using a round cookie cutter, cut out 6 rounds from the dough. Place on a large parchment-lined baking sheet spacing far apart. Cover and let rise until puffy, about 30 minutes.
Meanwhile, preheat the oven to 350°F. Bake the doughnuts for about 10 minutes, or until golden brown and puffed. Let cool enough to be handled.
In a shallow dish combine the cinnamon and sugar for the topping. Dip each warm doughnut in the melted butter, the coat in the cinnamon sugar.
Remove the cream cheese mixture to a piping bag fitted with a long filling tip. Insert the tip into the side of a doughnut and squeeze the filling inside to fill. Repeat for the remaining doughnuts. Top each doughnut with a dollop of the cream cheese mixture then drizzle with jam.
Doughnuts are best served the day they’re made.
Hiya! I’ve got a great drink for you to celebrate the upcoming Autumn Sabbats:
Lavender Cider Tea:
This one is super easy.
Serves: 1
Ingredients:
3x Apples
water to cover but not over fill
blender
french press for coffee or cheese cloth (and a funnel and bowl if you use cheese cloth)
1tblsp vanilla
1tsp cinnamon
1tblsp of food grade lavender
1tblsp of sugar (I use monkfruit sweetener myself)
Directions:
1. Chop apples into chunks removing the core. Blend the apples in your blender with enough water to cover
2. Pour apple mix into french press and slowly filter out the apple purée. (If using cheese cloth. Add apple purée slowly. And let it drain. After, squeeze as much fluid out as you can) Do this a few times until mostly clean. (took me a couple filters, but I do smaller batches)
3. pour cider into a saucepan to heat. Add sugar, cinnamon, and vanilla
4. once heated, skim off some of the scum that floats to the top. And pour into a cup with your lavender (I use a reuseable tea/spoon steeper.
5. Let steep for 3-5 min
(I use the leftover apple purée and I make a doggy treat, I mix in plain yogurt with a bit of natural peanut butter and stick it in the freezer for my dogs later. Just make sure there’s no seeds)
Enjoy! Great for sleep or celebrating a harvest sabbat. Or if you want to do a past life regression journey. As lavender has great mental benefits.
Let me know how your cider tea turns out!

Fresh Strawberry and Cream Cheese Danish
INGREDIENTS:
2 sheet Puff Pastry dough, thawed
8 ounces Cream Cheese, softened
1 tsp Vanilla Extract
½ tsp Almond Extract
4 Tbsp Sugar
1 ½ cup Fresh Strawberries, sliced
1 Tbsp Cornstarch
1 Egg + 2 Tablespoons water, whisked for egg wash
DIRECTIONS:
Preheat oven to 400 degrees. Line a baking sheet with parchment paper or a silicone baking sheet.
In a small bowl, mix together the strawberries and corn starch. Set aside.
On a lightly floured surface roll out thawed puff pastry into a 12×9″ rectangle. Cut in half lengthwise, yielding 2 4-½” strips. Cut those two strips crosswise into thirds, to yield six 4×4 ½” pieces.With a knife, score ½” border around the edge of each piece of puff pastry. Use a fork to make five or six pricks into the dough within the border of each piece. This will help keep the middle of each piece from rising.
In a bowl, stir together softened cream cheese, sugar, and vanilla and almond. Spoon about 2-3 tablespoons of mixture into the middle of each piece of dough and spread around evenly, ensuring the mix stays within the borders.
In the middle of the cream cheese, add a couple of spoonfuls of strawberries into the middle.
Bake for 18-20 minutes, on the middle rack and rotate the baking sheet half way through baking. Remove from baking sheet and cool on a wire rack. Serve warm or room temperature. Sprinkle with powdered sugar before serving. Shave chocolate over the top as well, if desired.
Super Fudgy Raspberry Stuffed Brownie Cookies
Ingredients
2 cups (200 g) raspberries, fresh or frozen
7 oz (200 g) dark chocolate, chopped
9 tbsp (125 g) unsalted butter, cubed
2 eggs
½ cup (100 g) white sugar
1 cup + 1 tbsp (130 g) plain gluten free flour blend (a simple store-bought blend of rice, potato and maize flour with no added xanthan gum)
¼ tsp xanthan gum
3 tbsp (20 g) cocoa powder
1 tsp baking powder
pinch of salt
Instructions
First, make the raspberry filling:
In a small saucepan, cook the raspberries on medium-high heat until they have released their juice and part of the liquid has evaporated.
Pass the raspberry mixture through a sieve to remove the seeds and skin.
Return the raspberry juice to the saucepan and cook further until it has decreased in volume to about ½ - ¾ cup.
Spread the raspberry reduction on a piece of aluminium foil (that should be placed on top of a freezer-safe tray or plate) so that you make an even layer ~3 mm thin.
Freeze it for at least ½ hour, or until frozen solid.
Pre-heat the oven to 355 ºF (180 ºC) and line two baking sheets with baking/greaseproof paper.
In a heat-proof bowl above a pot of simmering water, melt the chocolate and butter together. Once melted, set aside to cool slightly.
In a stand mixer (or using a hand mixer with the double beater attachment), beat the eggs and sugar together for 5 - 6 minutes, until pale, fluffy and greatly increased in volume.
Add the melted chocolate to the egg mixture, and mix briefly until the chocolate has been evenly incorporated.
Sift together gluten free flour, xanthan gum, cocoa powder, baking powder and salt, and add it to the mixer. Mix for 30 seconds to 1 minute, until all flour has been incorporated and no flour clumps remain. Scrape the sides and the bottom of the bowl with a spatula to ensure the cookie batter is an smooth as possible.
Using a cookie scoop (or an ice cream scoop, or even just a spoon), transfer ~1 - 2 tbsp of the cookie batter onto the lined baking sheet and spread it out slightly (into a circle about 2 inches (5 cm) wide and about ¼ - ½ inch (6 - 12 mm) tick).
Cut a piece of the frozen raspberry filling that’s about ½ inch smaller in diameter than the cookie batter “circle” you’ve just made, and place it in the middle of the cookie batter.
(You don’t have to cut the filling in a circle, a square or rectangle that’s smaller than the cookie batter “circle” work just as well.)
Place ~1 tbsp of the cookie batter on top of the filling, and smooth it out using a spoon so that it completely covers the filling.
Repeat with the rest of the cookie batter and raspberry filling. This recipe makes about 10 - 12 cookies.
Bake in the pre-heated oven at 355 ºF (180 ºC) for 12 minutes. The cookies should be slightly crackly on top, with a shiny crust. They will be soft when they come out of the oven, so leave them on the baking tray for about 1 minute before you transfer them to a cooling rack.
Enjoy!
These raspberry stuffed brownie cookies keep well in a closed container in a cool dry place for about 1 week.
Strawberry Milk
Ingredients:
14 strawberries
1/3 cup white sugar
1~1 ¾ cup milk
Recipe
wash the strawberries, crush 6 pieces of them
mix with sugar and heat on medium heat
when it begins to boil, boil for 2~3 more minutes and let it cool down
cut off the rest of the strawberries in small sizes
put the syrup, strawberries and milk in one bottle
Original video is here: https://youtu.be/5itl-NItMdI
This is not original content, I am not the owner
strawberry juice 🍓


ingredients:
- 8 frozen strawberries
- 2 tbsp of honey
- 2 tbsp of lemon juice
- 4 cups of water
- mint leaves
- ice
instructions:
boil the water in a medium pot! when the water starts to boil add six of the frozen strawberries
let them boil for about ten minutes, then remove the strawberries with a fork! add honey to the strawberry water and let it sit for about 2 minutes
strain any strawberry bits out of ur juice (that part is completely optional) and then pour it into a cup/jar! add lemon juice and two frozen strawberries and let it chill in the fridge for a few hours
remove the strawberries, replace them with ice, and garnish with lemon slices and fresh or frozen strawberries and mint leaves!
most important step: take pictures and send them to me or reblog them onto this post!!
Summer solstice honey cakes ☀️🌻

Happy summer solstice! Here’s a recipe to honour the day:
(Makes about 30 cupcakes or 2 big cakes)
Ingredients:
Cake:
450g plain flour
225g butter
4 tbsp honey
150g sugar
1 tsp baking powder
1 tsp cinnamon
1 tsp salt
4 eggs
250 ml milk
1 tsp vanilla extract
Icing:
150g icing sugar
20 ml water
1 tsp cinnamon
As much honey as you want
Lavender (optional)
1. Lay out cake cases or grease your tray if you are making one big cake and preheat your oven to 180C/350F
2. Mix the flour, sugar, baking powder, cinnamon and salt together
3. Add the eggs, honey, butter, milk and vanilla extract and mix until smooth
4. Put the mixture into whatever you are baking it in
5. Bake for 20mins (cupcakes) or 40mins (big cake)
6. Whilst cakes are baking prepare your icing. Mix together the icing sugar, water, cinnamon and honey until smooth. Add more water if you need to.
7. Once the cakes are done, take them out and leave to cool
8. When the cakes are cool, drizzle the icing onto them. Add lavender if you wish
9. Eat!


This is my favorite form of entertainment.